Qingping Air Quality Monitors in Home Assistant
Over the past few years I’ve been having lots of fun playing with Home Assistant and home automation in general. One of the things which is underdocumented but kind of interesting is how to get air quality monitors connected to Home Assistant.
I currently use two different types of air quality monitors, both made by Qingping. There are, of course, alternatives, but the Qingping devices are reasonably priced when they’re on sale and they tend to look pretty nice.
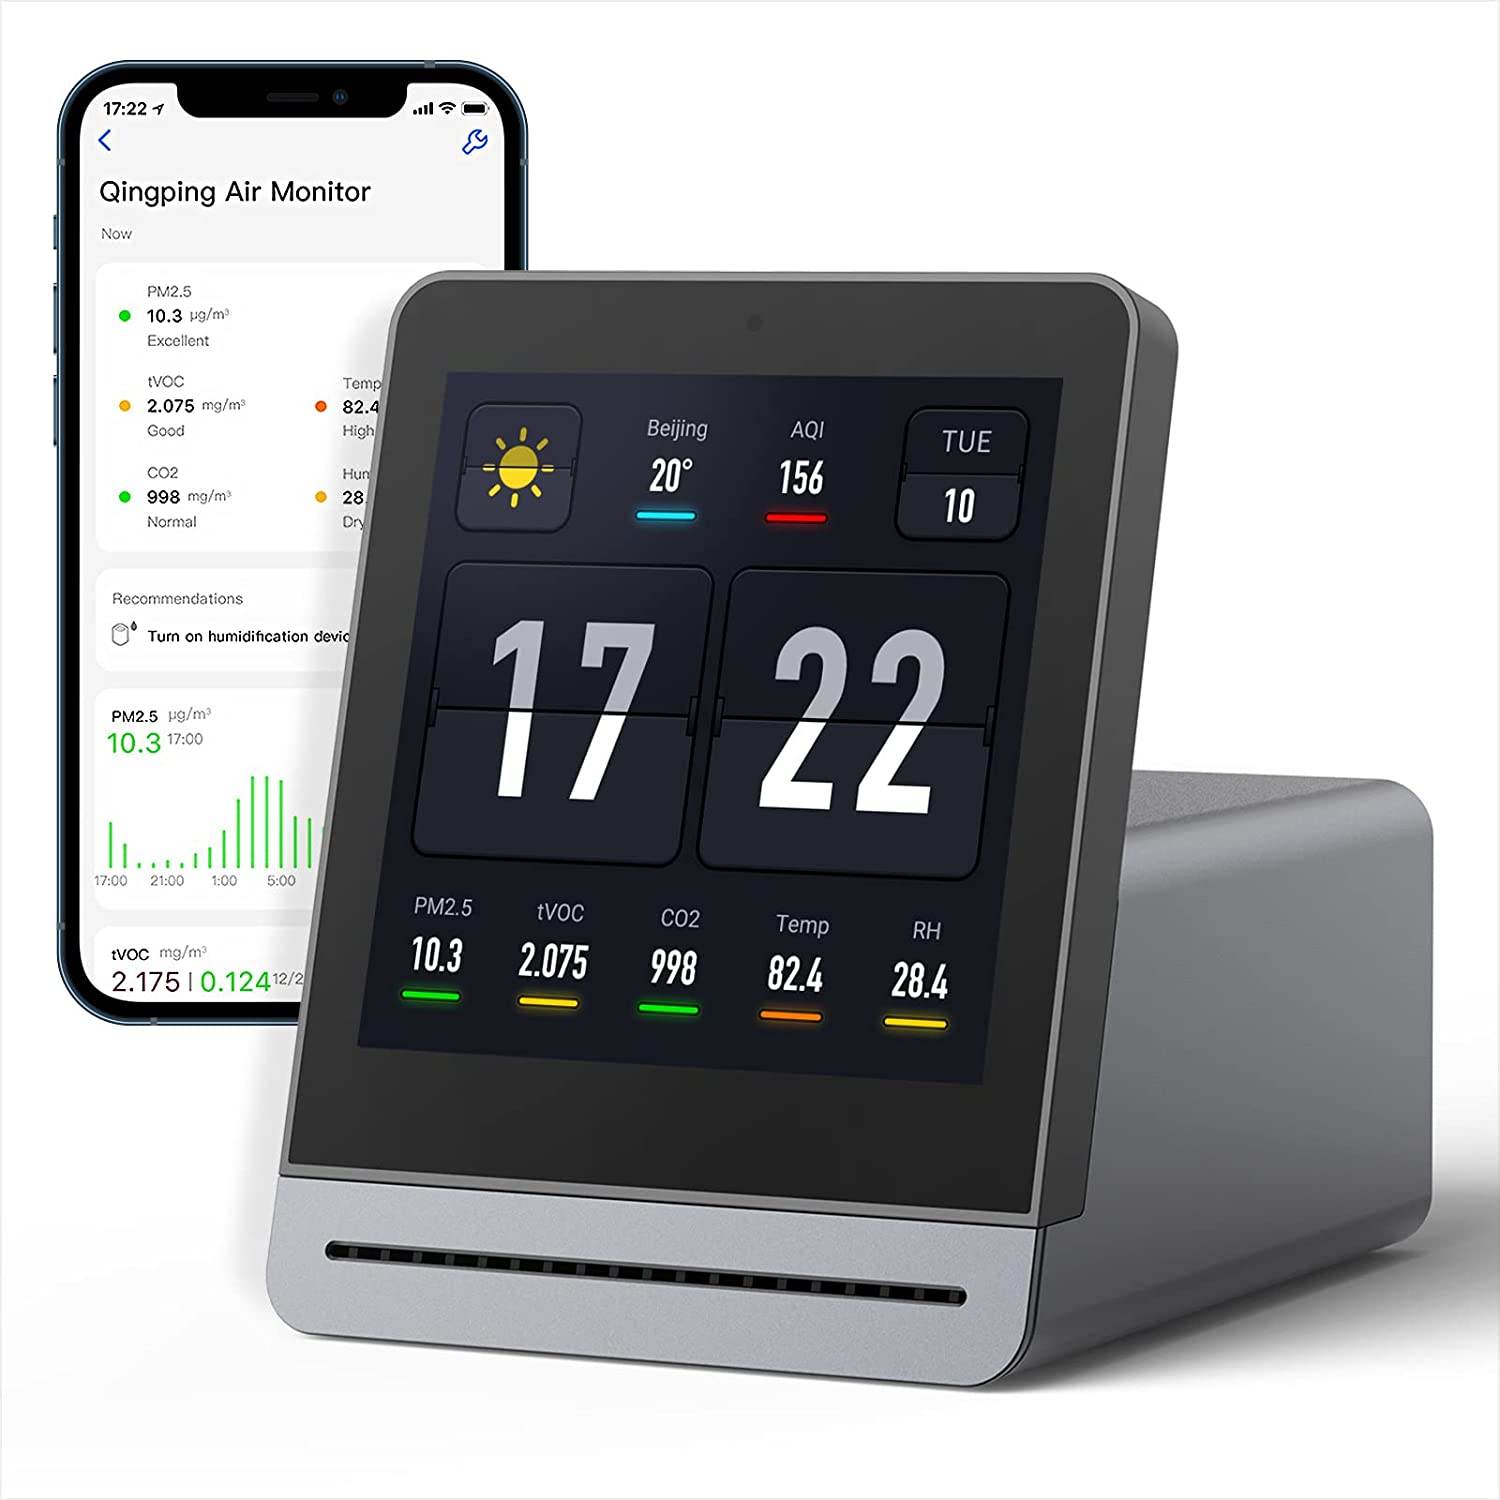
Air Quality Monitor (CGS-1)⌗
The Qingping Air Quality Monitor is actually pretty full-featured. It has a touchscreen where you can configure connecting it to Wifi and the Qingping+ app (or Mi Home, since Qingping IOT is compatible with Xiaomi IOT). More importantly, the device actually has support for self-hosted MQTT!
I got most of the information for setting this up from this thread.
Step 1. Set up a locally hosted MQTT server⌗
I use docker compose for my Home Assistant setup, so I added an instance of
the Mosquitto MQTT server and exposed it locally. My Home Assistant container
runs in host networking mode, so it was easier this way. This also lets you
debug the MQTT traffic using MQTT Explorer.
mosquitto:
  <<: *common-keys-core
  container_name: mosquitto
  image: eclipse-mosquitto
  volumes:
    - $DOCKERDIR/appdata/mosquitto:/mosquitto
    - $DOCKERDIR/appdata/mosquitto/data:/mosquitto/data
    - $DOCKERDIR/appdata/mosquitto/log:/mosquitto/log
  ports:
    - "1883:1883"
    - "8083:8083"
    - "9001:9001"
  environment:
    - TZ=$TZ
Step 2. Configure the Air Quality Monitor to send data to your MQTT server⌗
In order to configure the Air Quality Monitor to send data to a local MQTT server, you need to register for a Qingping account (e.g. via the Qingping+ app) and then go to the developer API console.
You’ll also need to have set up the Air Quality Monitor in the Qingping+ app so it knows it is associated with your account, though you only have to do this once to get the MAC address linked.
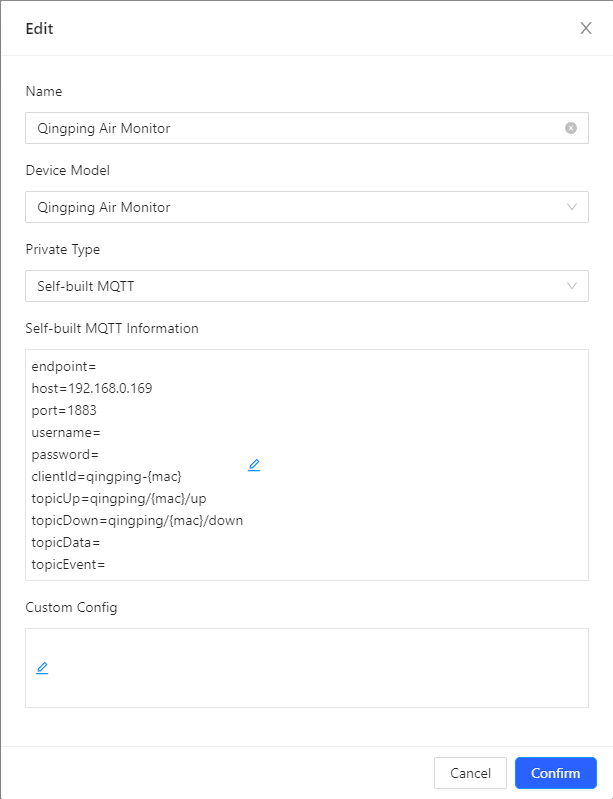
In the developer console you will need to add a “Private Access Config”:
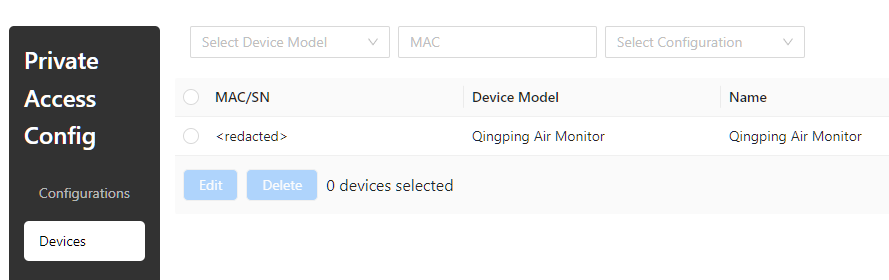
You then have to assign that configuration to your actual device, which you can do in the Devices page
In order for the device to pick up the new configuration, you will need to reset the device! The actual device has a menu item in the settings which supposedly reloads the MQTT configuration and connects to the server, but it doesn’t actually send any data unless you reset it.
To test whether things are working, open up MQTT Explorer and you should see
your device beginning to send data on its qingping/{MAC}/up topic.

Normally, the Air Quality Monitor is configured to send data only once every 15 minutes; I want a (more) live feed and so configured it to send every 15 seconds.
You can do this by sending a message to the qingping/{MAC}/down topic:
{
  "id": 1,
  "need_ack": 1,
  "type": "17",
  "setting": {
    "report_interval": 15,
    "collect_interval": 15,
    "co2_sampling_interval": 15,
    "pm_sampling_interval": 15
  }
}
Step 3. Configure Home Assistant to create sensors for the data that the Air Quality Monitor sends⌗
In Home Assistant, we need to make sure that we have configured the MQTT
integration (the server is running on localhost:1883), and then we need to
tell it about the sensors – the Qingping Air Quality Monitor doesn’t produce
the data in a format that Home Assistant understands natively.
Then, in configuration.yaml, you can add all of the sensors:
mqtt:
  sensor:
    - name: "CO2"
      object_id: air_monitor_co2
      device_class: carbon_dioxide
      unit_of_measurement: "ppm"
      state_topic: "qingping/{mac}/up"
      value_template: >-
        {{ value_json.sensorData.0.co2.value
          if value_json.type=="17" else this.state }}
      availability:
        - topic: "qingping/{mac}/up"
          payload_available: "true"
          payload_not_available: "false"
          value_template: >-
            {{ "true" if value_json else "false" }}
      device:
        identifiers: ["{mac}"]
        name: "Air monitor"
        model: "CGS1"
        manufacturer: "qingping"
      unique_id: f0864ae1d3e66cdb5a29c894dd6a192f8ba528ec
    - name: "PM2.5"
      object_id: air_monitor_pm25
      device_class: pm25
      state_topic: "qingping/{mac}/up"
      value_template: >-
        {{ value_json.sensorData.0.pm25.value
          if value_json.type=="17" else this.state }}
      unit_of_measurement: "µg/m³"
      availability:
        - topic: "qingping/{mac}/up"
          payload_available: "true"
          payload_not_available: "false"
          value_template: >-
            {{ "true" if value_json else "false" }}
      device:
        identifiers: ["{mac}"]
        name: "Air monitor"
        model: "CGS1"
        manufacturer: "qingping"
      unique_id: 0c4f328dd042cdfc17f01ec2f880e7dd5317750b
    - name: "PM10"
      object_id: air_monitor_pm10
      device_class: pm10
      unit_of_measurement: "µg/m³"
      state_topic: "qingping/{mac}/up"
      value_template: >-
        {{ value_json.sensorData.0.pm10.value
          if value_json.type=="17" else this.state }}
      availability:
        - topic: "qingping/{mac}/up"
          payload_available: "true"
          payload_not_available: "false"
          value_template: >-
            {{ "true" if value_json else "false" }}
      device:
        identifiers: ["{mac}"]
        name: "Air monitor"
        model: "CGS1"
        manufacturer: "qingping"
      unique_id: 0e330464965310305e8df5187ba00e5a6b515471
    - name: "TVOC"
      object_id: air_monitor_tvoc
      device_class: volatile_organic_compounds
      unit_of_measurement: "mg/m³"
      state_topic: "qingping/{mac}/up"
      value_template: >-
        {{ (value_json.sensorData.0.tvoc.value / 218.77) | round(3)
          if value_json.type=="17" else this.state }}
      availability:
        - topic: "qingping/{mac}/up"
          payload_available: "true"
          payload_not_available: "false"
          value_template: >-
            {{ "true" if value_json else "false" }}
      device:
        identifiers: ["{mac}"]
        name: "Air monitor"
        model: "CGS1"
        manufacturer: "qingping"
      unique_id: 145ba4f594273ed8cfcf44f8df1983e3a229b0d1
    - name: "Humidity"
      object_id: air_monitor_humidity
      device_class: humidity
      state_topic: "qingping/{mac}/up"
      value_template: >-
        {{ value_json.sensorData.0.humidity.value|round(2)
          if value_json.type=="17" else this.state }}
      unit_of_measurement: "%"
      availability:
        - topic: "qingping/{mac}/up"
          payload_available: "true"
          payload_not_available: "false"
          value_template: >-
            {{ "true" if value_json else "false" }}
      device:
        identifiers: ["{mac}"]
        name: "Air monitor"
        model: "CGS1"
        manufacturer: "qingping"
      unique_id: 5648fe503a9c4c7563643425de97f184a3282a66
    - object_id: air_monitor_temperature
      name: "Temperature"
      device_class: temperature
      unit_of_measurement: "°C"
      state_topic: "qingping/{mac}/up"
      value_template: >-
        {{ value_json.sensorData.0.temperature.value|round(2)
            if value_json.type=="17" else this.state }}
      availability:
        - topic: "qingping/{mac}/up"
          payload_available: "true"
          payload_not_available: "false"
          value_template: >-
            {{ "true" if value_json else "false" }}
      device:
        identifiers: ["{mac}"]
        name: "Air monitor"
        model: "CGS1"
        manufacturer: "qingping"
      unique_id: eeac725e7c2bc220e8ef3602b7a506a9855a36c6
The unique IDs and object IDs just need to be unique - if you have more than one sensor, update appropriately. You can then add the sensors in your dashboard!
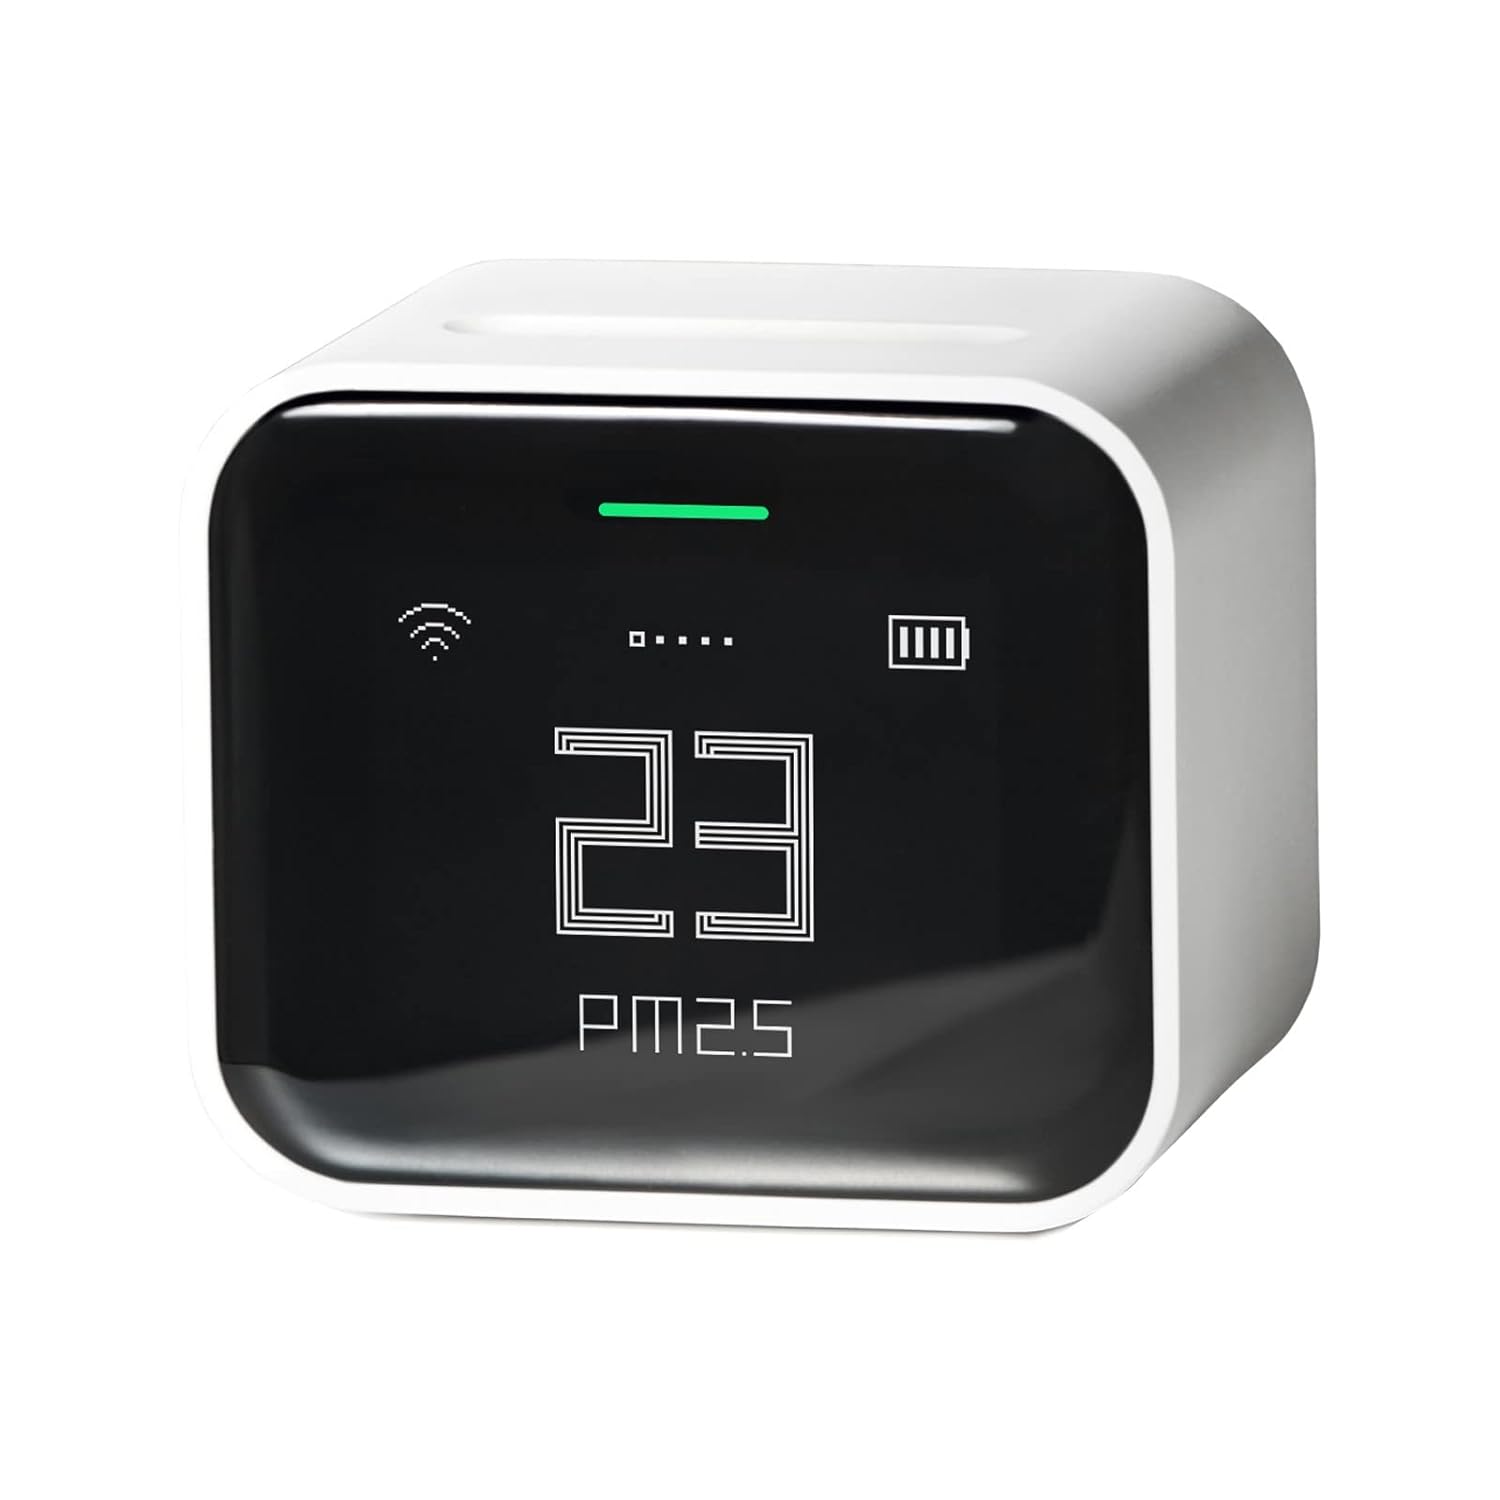
Air Quality Monitor Lite⌗
The Air Quality Monitor Lite is much easier to set up, because it’s actually HomeKit compatible!
Step 1. Start setup using the Qingping+ App in HomeKit mode⌗
This is easiest on an iPhone: install the Qingping+ app and follow the instructions to set up the Air Quality Monitor Lite in HomeKit mode (not Qingping+ mode).
Step 2. Ensure the HomeKit integration is enabled in Home Assistant⌗
You’ll want to make sure that both the HomeKit Bridge and the HomeKit Device integrations are enabled on your Home Assistant installation.
Step 3. Remove the Air Quality Monitor Lite from your phone and add it to Home Assistant⌗
The Air Quality Monitor Lite only knows how to talk to a single coordinator, and it’s currently set to talk to your phone! Remove it from HomeKit on the phone and Home Assistant will automatically detect a HomeKit device on the network.
Once you add it to Home Assistant, the sensors should be available for you to graph and record.
Step 4. Bridge the sensors back to your HomeKit setup⌗
If you still want to be able to access the Air Quality Monitor Lite from your phone in the Home app, you can actually set up a HomeKit Bridge from Home Assistant back to your phone.